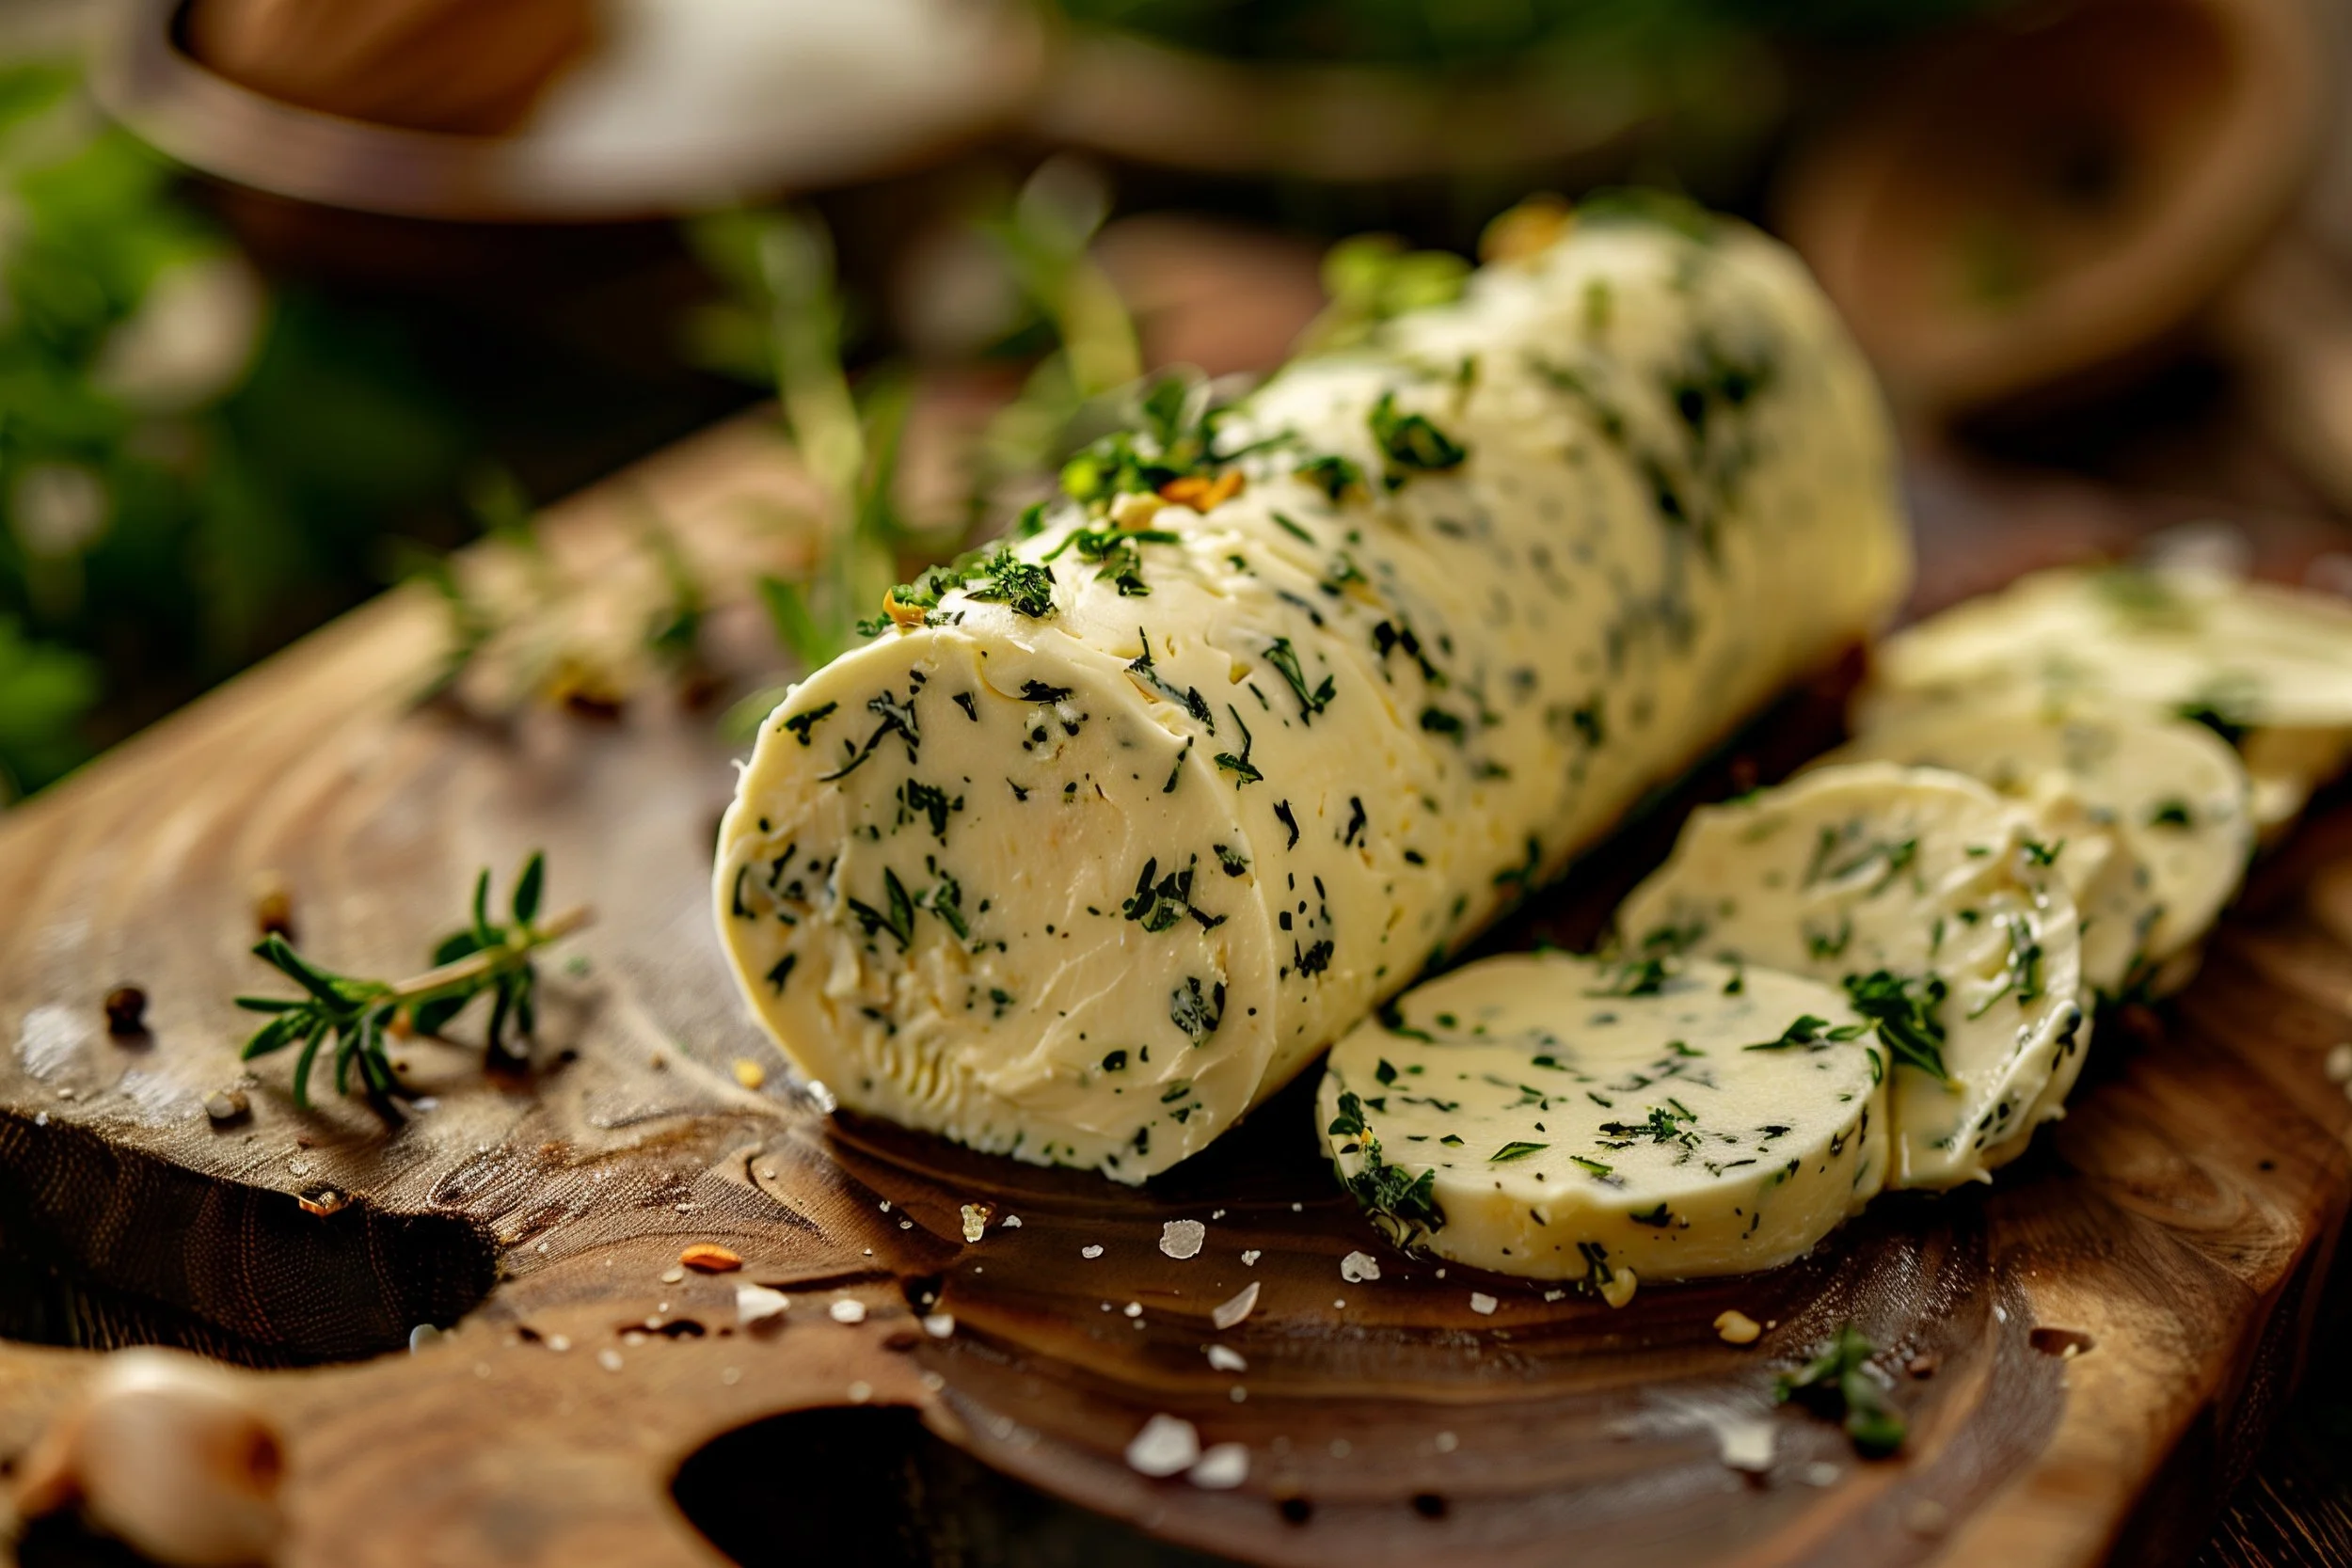
Easy Homemade Compound Butter Recipe: Enhance Your Meals with Flavorful Butter Blends
Yield: 4 logs
Prep time: 10 minutes
Chill time: 2 hours
Compound Butter
You know those mouthwatering steaks and juicy chicken you get at those typical corporate restaurants, you know; like the Keg, Moxies, Red Lobster? The magic ingredient? Herbed compound butter. It was a true "aha!" moment for me—realizing this simple addition was what set so many of the dishes served at those places above the standard.
A Simple Revelation
When I first discovered how to whip up herbed butter, aka compound butter, I was genuinely surprised by its simplicity. Here was this flavour powerhouse, capable of transforming a plain grilled steak into something you’d boast about, and it was just butter with herbs! You take softened butter, mix in some finely chopped herbs like parsley, chives, and whatever else you fancy, add a little garlic and citrus zest, and suddenly have yourself a “secret weapon” for almost any dish.
A Kitchen Staple That Lasts
Another fantastic perk of herbed compound butter is how long it can last in your freezer. You can prepare a batch, roll it up and store it in the freezer. This stuff will last you through the entire summer BBQ season. Imagine firing up the grill on a sunny afternoon and knowing you’ve got that herbed butter ready to go, capable of turning your simple barbecue into a gourmet affair. Not to mention its versatility.
Ingredients
454g unsalted butter, softened (1 pound)
8 cloves garlic, finely minced
1/2 bunch fresh parsley, finely chopped
1 bunch fresh chives, finely chopped
1 bunch fresh thyme leaves, finely chopped
Zest of 2 lemons
Optional: Zest of 1 orange for a citrus twist
1 tsp salt (5 ml)
1/2 tsp black pepper (2.5 ml)
Tools Needed
Mixing bowl
Spatula
Cling film or parchment paper
Ziplock bag
Optional Variations
Herbs: Add 2 tsp of finely chopped rosemary or dill for additional flavours.
Spicy Touch: Include a pinch of smoked paprika for a smoky flavour.
Roasted Garlic: For an extra complex garlic flavour
If using dried herbs: 4 tsp dried parsley, 4 tsp dried chives, 2 tsp dried thyme
Method
Softening the Butter: Allow the butter to sit on the countertop for about an hour to soften. This makes it easier to mix with the other ingredients.
Prep the Herbs:
Thyme: Pick the leaves from the thyme stems. Finely chop the leaves and set aside.
Chives: Finely chop the chives and set aside.
Parsley: Pick the leaves from the parsley, chop them finely, and set aside. Save the stems for stock if desired.
Mince the Garlic: Mince the garlic very finely to maximize flavour release. For best results, use a microplane or a garlic press to achieve a finer mince.
Combine Ingredients: In a mixing bowl, add the softened butter, minced garlic, chopped parsley, chives, and thyme. Include the zest of two lemons. Sprinkle in the salt and black pepper. Mix all ingredients together until well incorporated. For best results, use a stand mixer with the paddle attachment to avoid incorporating too much air, which could happen with a whisk.
Shape and Chill:
Forming the Log: Place the butter mixture on a piece of cling film or parchment paper. Shape the mixture into a log by rolling it in the cling film, and twisting the ends to secure.
Refrigerate: Chill the butter log in the refrigerator until firm, about 1 hour.
Storage:
Refrigerator: The herbed butter can be kept in the refrigerator for up to a few weeks.
Freezer Storage: For longer storage, place the butter logs in a ziplock bag, squeeze out the air, and freeze. Properly stored, the butter can last for 3 to 6 months in the freezer.
Uses
Grilled Meats: Add a slice to hot steaks or fish right before serving to melt in rich, herby flavours.
Vegetables: Toss herbed butter with steamed or roasted vegetables like potatoes or asparagus for enhanced taste.
Sauces: Stir into sauces or gravies for an instant flavour boost, especially in cream-based or pan sauces.
Bread: Spread on bread before toasting for flavorful garlic bread or enhanced sandwich bases.
Eggs: Cook eggs in herbed butter for a luxurious texture and depth in omelets or scrambles.
Pasta and Rice: Mix into freshly cooked pasta or rice to season these sides effortlessly.
Corn on the Cob: Brush over hot corn on the cob for a classic, buttery treat.
Seafood: Use as a basting butter for lobster, shrimp, or scallops during cooking for extra flavour.
Extra Cooking Tips:
Garlic: When using garlic, the finer you mince it, the more intense the flavour will be. Using a microplane or garlic press can help maximize the garlic's potency, infusing the butter with a robust flavour.
Herbs: Fresh herbs provide a vibrant taste, but if they aren’t available, remember that dried herbs are more concentrated. Soak dried herbs in a little warm water for a few minutes before using them to revive their flavours.
Avoid Air Incorporation: If using a stand mixer, use a paddle attachment on a stand mixer or mix by hand with a spatula. This helps keep the butter dense and prevents it from becoming too airy, which could affect how it melts and spreads.
Log Formation: Rolling the butter into a log using cling film is a traditional method that allows for easy slicing. Make sure to twist the ends tightly to keep the shape and maintain freshness.
Refrigeration: Chill the butter until firm, which usually takes about an hour, to make it easier to cut into clean slices.
Freezing for Longevity: For extended storage, wrap the butter log tightly in cling wrap and then place it in a ziplock bag with the air removed. It can be stored in the freezer for up to 6 months without losing flavour.
Softening Before Use: To get the most flavour out of the herbed butter, remove it from the fridge about 10-15 minutes before use to soften. This makes it easier to spread and allows the flavours to come through more prominently when melted. Alternatively, you can slice cold disks and add them directly to finish a hot dish.
Compound Butter Coins: Instead of a log, you can also chill the butter in small moulds or ice cube trays to create individual butter portions, which are great for serving at dinners.
Herb Variations: Experiment with different combinations of herbs based on seasons or dishes. For example, adding basil or mint could give a fresh twist to summer dishes.
Elevating Every Meal
I encourage you to experiment and create your own versions of compound butter. This version is the most basic one that every restaurant uses. Think of the butter as a blank canvas, and your spices, herbs, and aromatics as the palette with which you can paint. Each ingredient adds a stroke of flavour, each combination a new masterpiece. Whether you're preparing for a family dinner or a special occasion, your custom compound butter will make it memorable.
As you embark on this journey of culinary creativity, share your unique recipes and experiences. What works, what doesn’t, what absolutely blows your mind—let’s start a conversation and inspire each other. Tag me on social media @the_eugefood with your experiments. Let’s push the boundaries of what we can achieve in our kitchens with a simple starting point like herbed compound butter.
Together, we're not just cooking; we're crafting a community of curious, passionate cooks who dare to try new things and delight in the joy of cooking. Let's continue to inspire and be inspired, one batch of butter at a time.
You’ll Also Love These
Hi, I'm Eugene, but many of you might recognize me as "The_EugeFood". With over two decades working in diverse kitchens, I've come to cherish the genuine connections and shared experiences that cooking brings. For me, it's not about the high-pressure, competitive world you see on TV. It's about the joy of gathering around a table, the stories shared over simmering pots, and the laughter that follows a shared meal. I'm here to demystify the culinary world, to show you that if you can boil water for cup noodles, you're already on your way. Cooking isn't just a skill; it's a journey of discovery, and I invite you to join me on this adventure to becoming a better cook.


